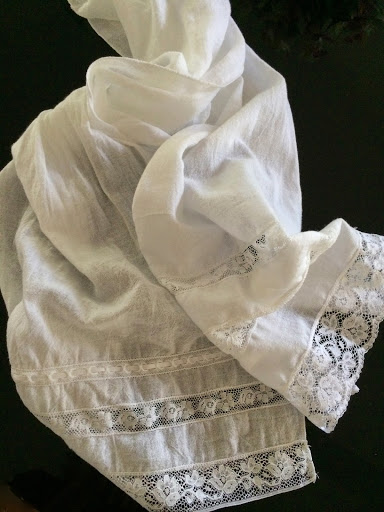
I love scarves. They can make an ordinary t-shirt extraordinary. But the perfect scarf is hard to find. What if I told you that you could make the perfect scarf in an hour or less using an ordinary flour sack towel? The loosely woven, 100% cotton flour sack is perfect for a soft, flowing, easy to dye scarf.
Fast and smart at less than $3.00, your flour-sack scarf can be dyed, embellished, or even heirloomed!
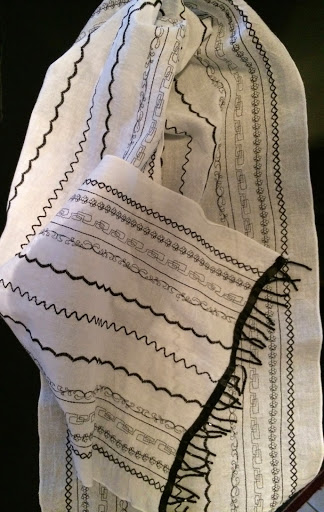
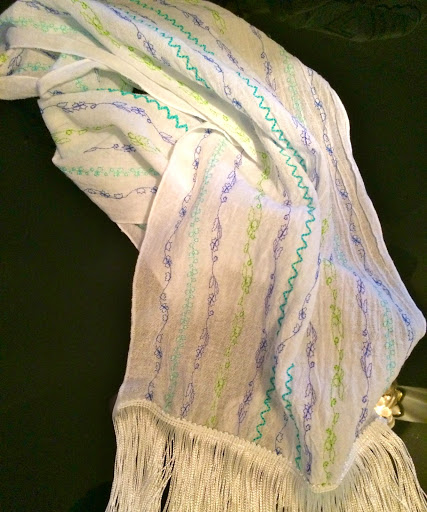
Have fun with the embroidery stitches built into your sewing machine to create a one-of-a-kind lovely scarf!
Happy Sewing!
Milinda
Supplies:
1 flour sack towel (available in kitchen towel section of major retailers)
Embroidery Machine
Coordinating thread with matching bobbins
Sulky Solvy (heavy)
Optional: Serger
trim
Instructions:
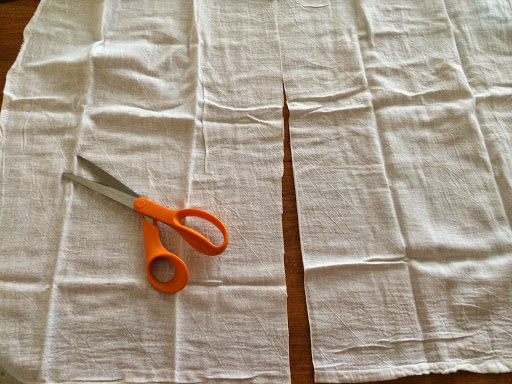
Step 1:
Cut towel in half
Step 2:
Sew or serge strips together, end to end to create one 60” long flour sack strip

Step 3:
Steam press newly created 60” strip
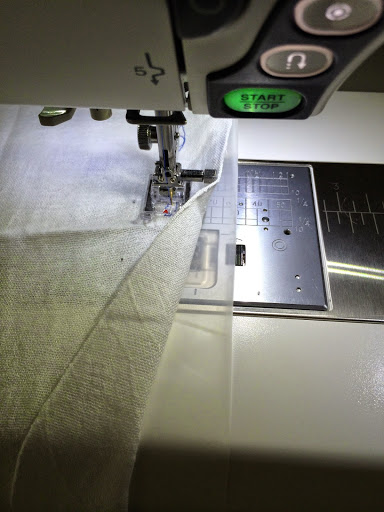
Step 4:
Serge or narrow hem long edges of scarf
Step 5:
Cut a strip of sulky solvy heavyweight the same width and length as your scarf
Step 6:
Place sulky solvy strip beneath flour sack strip
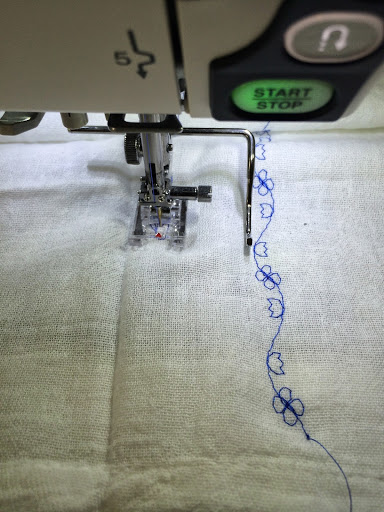
Step 7:
Choose your first stitch pattern
Determine where you want your first line of stitching, mark a measurement on your machine bed
Begin sewing
Step 8:
Continue adding lines of stitching changing colors if you wish, until you are happy with your results!
Note: using your quilting guide bar can be helpful when you begin stitching the center lines of your creation.
Notes while sewing
Note: It’s very helpful to have digital movies to watch as you sew. Each scarf took a total of 3 hours to sew! That’s four episodes of “Lie to Me” and four episodes of “Justified”
I set my I-phone on top of my machine, turn on Netflix and sew.
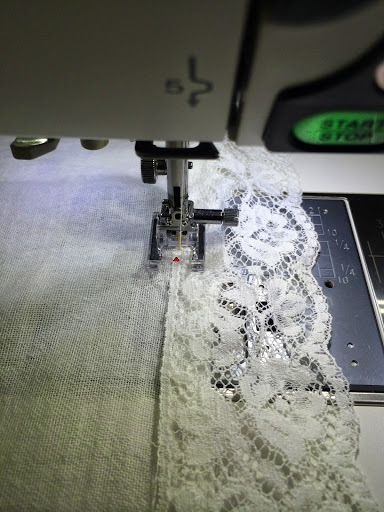
Step 9:
Serge, narrow hem or add trim to ends of scarf
Voila!
Visit me at milindajay.com
Visit me at milindajay.com
